Please note that due to service volume, it is normal to expect most services to take 2-4 days to complete.
When you are riding regularly, sooner or later your equipment will need some service or maintenance. Jibs offers full tune-up and repair services for pro scooters, BMX bikes, and skateboards. We even offer bar cutting and slitting. You may drop off your equipment for assessment at our store at which point one of our expert staff will provide a service quote, and estimate when your equipment will be available for pickup. While we strive for the most timely service turnaround possible, we are unable to guarantee service while you wait. Prices are subject to vary depending on the condition of your equipment, but below are some general rates to get an idea of what your repair may cost:
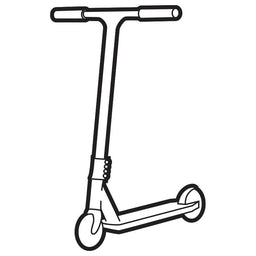
Scooters
- Custom scooter assembly: $29.95
- Install fork or headset: $19.95
- Install wheels or pegs: $14.95
- Install wheel bearings: $14.95
- Install brake/fender: $14.95
- Install handlebar or clamp: $14.95
- Handlebar cut (width): $14.95
- Handlebar cut (height/slit): $9.95 and up
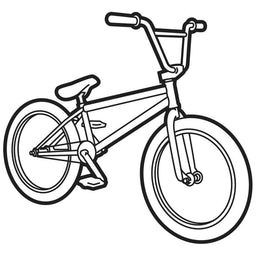
BMX
- BMX assembly (full service): $49.95
- Install stem, fork, or headset: $24.95
- Install crank or sprocket: $29.95
- Tighten headset: $14.95
- Install wheel, tire, or tube: $14.95
- Install brake: $29.95
- Install chain: $14.95
- Handlebar cut: $14.95
- Install pegs: $14.95
- Wheel true: $19.95 and up
- Wheel build: $49.95 and up
Shop rate: $59.95/hour
Minimum charge: $9.95
Tech Tips
We always recommend that riders familiarize themselves with their own equipment. Freestyle riding puts high stress on components, so learning how to do your own maintenance is definitely useful. Below are a few tech tips to help get you started or you can check out our TikTok account where we upload lots of how-to videos for your scooters, skateboards, and BMX bikes.
How to Adjust HIC/IHC Scooter Compression

Keep your IHC/HIC compression tight by following these steps. Making sure your compression is tight will keep your scooter quiet and smooth. If you feel your bars wiggling back and forth you need to do this!
- Loosen clamp bolts with a 5mm Allen key
- Slide bars off
- Tighten top cap with 5mm Allen key
- Slide bars back on and straighten them with the wheel
- Tighten clamp bolts
How to Install BMX or Scooter Grips (Without an Air Compressor)
Not everyone has access to an air compressor to easily install grips. Instead, check out this trick that uses zip-ties to make grip installation easier. This works for both BMX bikes, and scooters.⠀
- Peel back the grip from the bar plug to make removal easier
- Remove bar plug from the handlebar
- If you don't want to save your grips, you can simply cut them off and skip to step 6. If you might want to re-use your old grips, start by sliding some zip ties between the grip and bar. We recommend at least 4.⠀
- Once there's enough zip ties under your grips, you should be able to slide the grip off the handlebar.⠀
- Your grips are now removed. You're half done!⠀
- Fill your new grips with zip ties. 4-6 zip ties should do it.⠀
- Position the zip ties evenly around the end of your bar, and slide the new grips on.⠀
- Once the grips are in place, pull out all the zip ties.⠀
- Re-install your bar plug.⠀
This method is great since your grip stays dry during installation, preventing "throttle grip"

How to Install Scooter Wheels

Replace or upgrade your scooter wheels by following these easy steps. You can get the tools to do this at Jibs!
- Undo the axle with two 5mm Allen keys on each side (some scooters may use different hardware, check the owner's manual to find out).
- Slide the axle out. Hold out your hand underneath to catch the spacers in case they fall out. You don't want to lose those!
- Pull the wheel out.
- Put the axle back in just far enough to slide a spacer on.
- Put the wheel in and slide axle through, just until you can see the axle flush with the bearing.
- Slide the spacer in and slide axle all the way through.
- Put the bolt in and tighten with a 5mm Allen key on each side.
How to Install BMX Pedals
This tutorial will teach you how to install new pedals on your BMX bike. It's quite simple to do, but the main thing to note is that your left-hand pedals are reverse threaded. This means that they spin the opposite way that you would normally loosen/tighten.
A pedal wrench is the best tool for the job, but some pedals will work fine with a normal 15mm wrench.
- Loosen the left pedal by turning clockwise.
- Loosen the right pedal by turning counter-clockwise
- Apply a dab of grease to the threads of your new pedals
- Thread the pedals in by hand. Remember to make sure the left pedal is threaded into the left crank, and right pedal into the right crank.
- Tighten the left pedal counter clockwise with a wrench.
- Tighten the right pedal clockwise.
You're done, your new pedals are now installed!

How to Install Skateboard Grip Tape
Learning how to install your own grip tape is an important skill for any skater. Be careful - razors are very dangerous. If you aren't 100% confident with the tools, get help from an adult.
- Start with a clean deck. You will need a razor blade, and a file or screwdriver.
- Peel the backing from the grip tape sheet.
- Starting at one end of the board, begin applying the tape.
- Make sure the tape is aligned with the board. Press down as you apply it to avoid air bubbles.
- File the grip tape around the edges of the board. This removes some of the grit, and makes it easier to cut. If you don't have a file, the edge of a screwdriver will suffice.
- Cut the edge of the grip tape with a razor blade. Be very careful!
- Poke holes for your truck hardware.
Your grip tape is applied. Reassemble your board and go shred!